Encrypted cloud backups with restic
⋅ 10 minute read ⋅ 2,009 words
Contents
My current backup strategy is pretty inconsistent. I run a weekly system backup of my MacBook onto an external hardrive sysbackup using
CarbonCopyCloner
. I also have another external hardrive photos1 to store files that don’t fit onto my MacBook and which isn’t backed up at all. Unfortunately, this includes most of my photos and videos. Storing those photos in the cloud would be a convenient option. However, I am not comfortable uploading important personal documents and photos to the cloud. Even if Google Photos is very insistent that I do so.
This status quo is eventually going to fail, e.g. if the photos1 drive breaks or both my MacBook and the sysbackup drive get destroyed at the same time (burglary, fire, flooding, ransomware attack). Recently, my photo hardrive made unusually loud noises when plugged in, which prompted me to finally adopt a more solid backup approach.
Generally for backups the 3-2-1 rule is recommended (3 copies, 2 different storage media, 1 off-site backup). To accomplish this I will periodically clone the external hardrive photos1 to a new external hardrive photos2 and also set up the off-site backup. This post is mostly about how I set up the cloud backup, but I will summarize the overall approach at the end as well.
§Requirements for my cloud backup
To find the right approach I wrote down my requirements:
- reliable and cheap cloud storage
- backups encrypted locally before upload
- open-source software to prevent vendor lock-in or software disappearing in 5 years.
- simple to use for someone comfortable with the command line
In the end I settled on
restic
which works on Linux, macOS, Windows, encrypts data locally by default, and doesn’t need to run on a server. I also looked into
BorgBackup
which probably would have worked as well. However, that requires running borg on the server. Moreover, the commands and basic configuration are straightforward.
§Getting cheap space in the cloud
I already have a Hetzner account to host my Nextcloud instance. Luckily, they offer very cheap storage. I got the Hetzner 1TB Storage Box for 3.83€/month. This means my data is stored in their datacenter in Falkenstein, Germany. Here you can see the inside of their datacenter.
To set up the Hetzner Storage Box to work with restic, you need to enable External Reachability, enable SSH, and set a password in the Hetzner console. The communication between my local machine and the storage box will be via SSH and the file upload happens over
SFTP
which is based on SSH.
First I create a new pair of SSH keys and then upload the public key to the storage box. In short: I have more detailed notes on setting up SSH keys here .
-
Create new SSH keys:
$ ssh-keygen -t ed25519 -f ~/.ssh/storagebox -
Add a host entry for the storagebox to your
~/.ssh/configfile:Host storagebox HostName uXXXXXX.your-storagebox.de User uXXXXXX Port 23 IdentityFile ~/.ssh/storagebox WarnWeakCrypto no-pq-kex -
Copy the public SSH key to the storagebox:
$ ssh-copy-id -p 23 -s -i ~/.ssh/storagebox.pub uXXXXXX@uXXXXXX.your-storagebox.de
You should now be able to interact via sftp without providing a separate password. Test that it works with:
$ sftp storagebox
§Installing and configuring restic
I installed restic via homebrew with brew install restic. I then configured two important environment variables in a new restic config file ~/.config/restic/env:
export RESTIC_REPOSITORY="sftp:storagebox:/home/restic-backup"
export RESTIC_PASSWORD=passwordhere
RESTIC_REPOSITORY is the director on the storage box where the backups are stored. This is called the restic repository. RESTIC_PASSWORD is the password that restic uses to encrypt my data locally before it is uploaded. To not forget it, I stored it in my password manager and also wrote it down in my notes.
Next I created the restic repository on the storage box with:
$ restic -r sftp:storagebox:/home/restic-backup initThis is all that is needed for the initial configuration. I can now start making backups.
§Basic restic backup commands
To backup the folder ~/important_docs/ to the restic repository on the storage box I run:
$ restic backup ~/important_docs --verboseRestic calls the content of a directory at a specific point in time a snapshot. This snapshot is now available in the repository and I can restore the whole snapshot or selected files of the directory back to my local machine.
If I run the above backup command again, restic will create a second snapshot, but not upload any files as none have changed. This deduplication makes sure that the data is stored efficiently.
§Inspecting the storage box
To inspect the files in my storage box I use Cyberduck . Create a new SFTP connection with the storage box details:
Server: uXXXXXX.your-storagebox.de
Port: 22
Username: uXXXXXX
SSH Private Key: ~/.ssh/storagebox
This opens the file viewer:
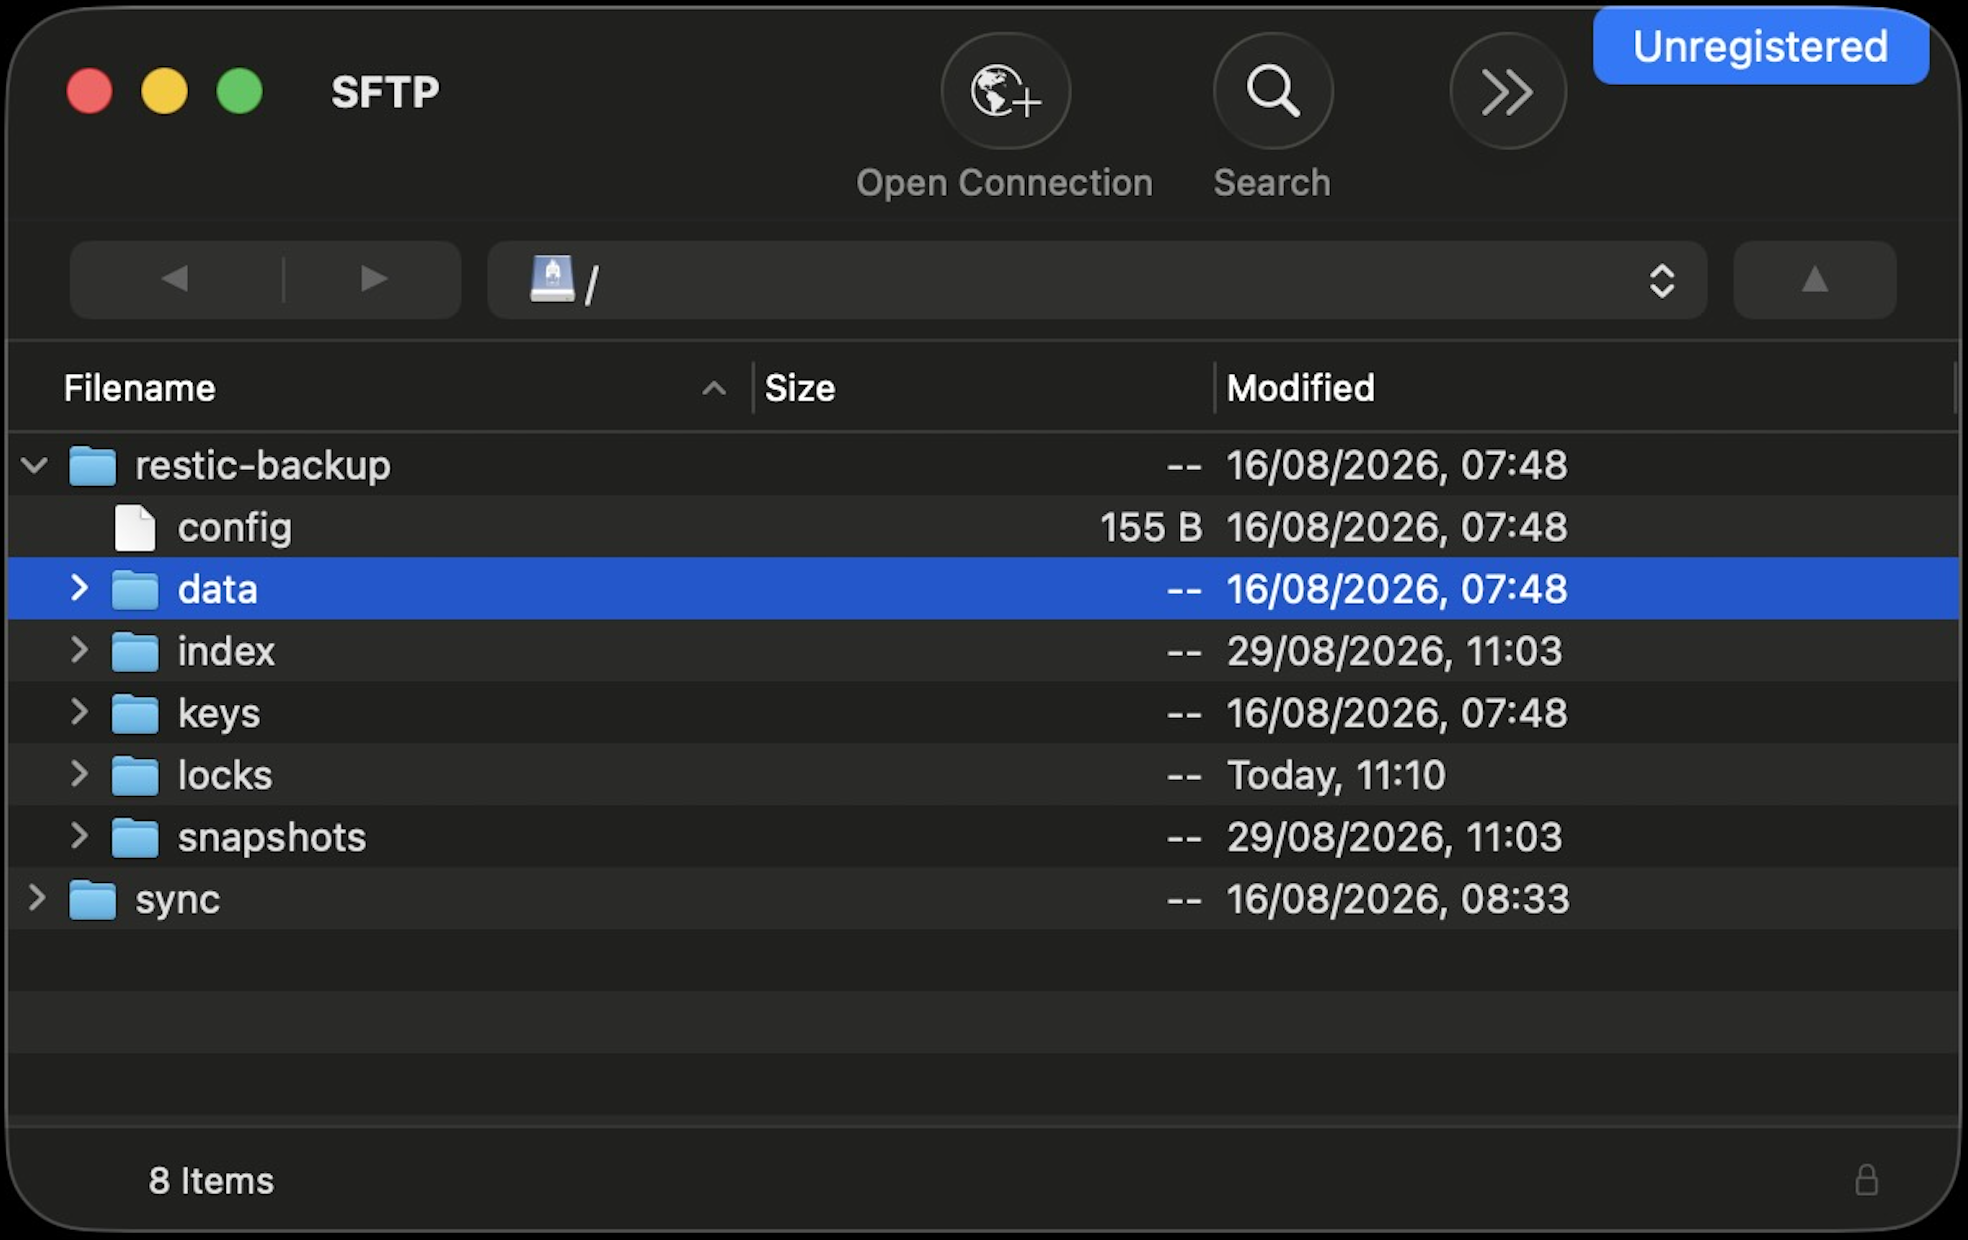
You can see that (encrypted) restic files have been uploaded to the subfolder restic-backup. Of course you can also store other things in the storage box, e.g. I have a separate sync folder that I use with rsync.
§Working with snapshots
Here are useful commands to inspect and manage snapshots taken in the past:
- To list all available snapshots in the repository:
restic snapshots. - To list all files in a specific snapshot with id
073a90db:restic ls 073a90db. - To view the size of the restic repository, run
restic stats --mode raw-data.
§Restoring backups
It is worth understanding how to restore a backed-up directory. Let’s say I want to restore snapshot a798b76e. If I run
$ restic restore a798b76e --target ~/restore-testrestic will reproduce all directories and files that are part of that snapshot in the provided target folder restore-test. If I just want to restore a single file from a snapshot I can use the --include flag, e.g.
$ restic restore a798b76e --include photo_of_grandma.jpg --target ~/restore-testThis will restore photo_of_grandma.jpg from snapshot a798b76e and make it available in the folder ~/restore-test. Important: To restore you will implicitely or explicitely need your restic password. Make sure you have it available.
§Managing the repository’s size and integrity
Two additional commands help me manage the repository and its size. To make sure that the data on the storage box hasn’t been corrupted I periodically run:
$ restic checkThis performs a structural integrity check of the data in the repository. Do the available files and the index match? Are there files not in the index? Check that it can decrypt snapshot metadata. This check is fast because it doesn’t actually read any data. If I want to also check that files are correct I need to append --read-data for a full repository read. This will likely take some time. Alternatively I can only check a subset of data with --read-data-subset=5% or --read-data-subset=500M.
The other important command is forget. My storage box only has a size of 1TB, so if I keep accumulating snapshots, I will eventually run out of space. forget and prune can be used to delete snapshots.
To manually delete a snapshot with id a798b76e I run:
$ restic forget a798b76eThis only deletes the snapshot. It doesn’t actually delete the data that was exclusive to that snapshot (not part of another snapshot). To delete this data I need to follow up with prune.
$ restic pruneor do it as part of the forget command:The restic docs recommend running a restic check after pruning operations to flag any issues.
$ restic forget a798b76e --pruneInstead of deleting a specific snapshot, I want to specify a deletion policy, e.g. “keep one backup for the last 6 month, one for the last 4 weeks, and daily for the current week.” Restic uses the --keep-* flag to specify such a policy. Use the --dry-run flag when trying this out the first time. Some example policies:
-
--keep-last nkeep thenlast (most recent) snapshots. -
--keep-daily nfor the lastndays which have one or more snapshots, keep only the most recent one for each day. -
--keep-weekly nfor the lastnweeks which have one or more snapshots, keep only the most recent one for each week.
These can be combined (union of snapshots). So for my desired policy I could use:
$ restic forget --keep-daily 7 --keep-weekly 4 --keep-monthly 6 --prune --verboseNote that one snapshot could fulfil multiple conditions.
§Scheduling and profiles with resticprofile
So far I only have a set of CLI commands that I would have to remember to run periodically.
To actually make restic work, I want scheduling and profiles.
Scheduling to reliably run the backup daily and profiles to have different command configurations for different backup sources, e.g. I want daily backups of core folders on my MacBook and only weekly backups for my external hard drive photos1.
I am using resticprofile for both which I install via homebrew
$ brew tap creativeprojects/tap
$ brew install resticprofile
With resticprofile I can use a yml or toml configuration file to specify commands and configurations for specific paths. I created two profiles here ~/.config/resticprofile/profiles.yml:
version: "1"

# default profile set up for files on my MacBook
default:
  repository: "sftp:storagebox:/home/restic-backup"
  initialize: false
  backup:
    source:
      - "~/core_data_from_my_macbook"
    exclude:
      - "~/stuff_I_want_to_exclude/"
    exclude-file:
      - "~/.config/restic/excludes.txt"
    verbose: true
    schedule: "11:00"
  forget:
    path: "~/core_data_from_my_macbook"
    keep-daily: 7
    keep-weekly: 4
    keep-monthly: 6
    prune: true
    schedule: "12:00"
  check:
    read-data-subset: "5%"
    schedule: "12:30"

# for `photos1` external hard drive
photos:
  repository: "sftp:storagebox:/home/restic-backup"
  initialize: false
  backup:
    source:
      - "/Volumes/photos1/Photos"
  forget:
    path: "/Volumes/photos1/Photos"
    prune: true
    keep-last: 5
The first profile default configures my MacBook backups. It specifies which folders to backup and is configured to run daily at 11am. At 12pm restic executes my forget policy on the specified paths and at 12:30 restic runs an integrity check.
I have set up a second profile photos to configure backups from my external hard drive to the same remote restic repository. The backup command is not scheduled. I only run it after I have copied new photos onto the harddrive, which only really happens every few weeks. The forget policy ensures the last 5 snapshots are kept.
To schedule this configuration, I run resticprofile schedule. On macOS this schedules the jobs in the launchd service manager. The first time this runs, macOS will require you to confirm permissions. I verified the schedule is set with launchctl list | grep -i restic.
Moreover, you can show all configured profiles with
$ resticprofile profilesI run the backup command for the photos profile manually with
$ resticprofile photos.backup§Conclusion
I have now been running this setup for a couple of weeks and so far I am happy with it. The important files on my MacBook are about 15GB which took 20-30min for the first uploaded snapshot. The photos1 hard drive has about 250GB of data which took 4-5h for the initial upload.
It’s also nice that this setup allows me to change storage vendor seamlessly, e.g. I can switch to AWS S3 or Backblaze B2 by just modifying the config file.
§Appendix
§Launchd schedules with closed lid
I noticed that some scheduled backups failed when my MacBook was asleep (lid closed). I think that it’s because launchd resumes scheduled jobs once the MacBook awakes but a network connection isn’t always immediately available. I added the schedule-after-network-online: true setting to my profiles.yml.
§Exclusion file
My profile uses an exclusion file ~/.config/restic/excludes.txt to ignore certain types of files I don’t want to back up, e.g. build artefacts or temporary files:
# Python
.venv
venv
__pycache__
*.pyc
.pytest_cache
.mypy_cache
.ruff_cache
.tox
*.egg-info

# Node / JS
node_modules
.next
.nuxt
.parcel-cache

# Editors & tooling
.idea
.vscode
*.swp
*~

# Caches & logs
.cache
*.log
*.tmp
.terraform

# OS junk
.DS_Store
._*
.Spotlight-V100
.fseventsd
.Trashes
.TemporaryItems
.DocumentRevisions-V100
Additionally I use the flag exclude-caches: true, which ignores all folders that have a CACHEDIR.TAG file, e.g. Rust cache directories.
§Locks
Certain restic commands put a lock onto the repository while running to prevent multiple clients from working on the same files. I can list all locks with
$ restic list locksSometimes failed commands leave the repository locked. If you are sure it’s safe to unlock it, run:
$ restic unlockIf you have any thoughts, questions, or feedback about this post, I would love to hear it. Please reach out to me via email.
Tags:
#backup